Metal Railings Guide: What to Pick, How to Install, How to Care
Metal railings are structural guard systems that provide safety, style, and long-term value for stairs, balconies, decks, and terraces. Made from wrought iron, aluminum, steel, or stainless steel, these railings protect your family while enhancing your home's appearance.
This comprehensive guide helps you choose the right metal railing by matching material properties to your location and budget. You'll learn safe installation techniques that meet building codes, plus maintenance strategies that prevent corrosion and extend the life of your railings for decades.
What you'll discover:
Material comparison tables showing cost, durability, and maintenance needs
Step-by-step installation instructions with safety guidelines
Targeted maintenance plans for coastal, snowy, and humid climates
DIY versus professional decision criteria
2025 design trends and smart features
Types of Metal Railings: Complete Material Comparison
Choosing the right metal railing starts with understanding how different materials perform. Each type balances strength, weight, corrosion resistance, and visual appeal for specific uses.

Material Properties, Best Uses, and Maintenance of Railings
Choosing the right railing material requires balancing aesthetics, durability, cost, and maintenance. Here's a detailed look at popular options:
Wrought Iron Railings
Wrought iron offers a classic, ornate appearance with excellent tensile strength, making it ideal for decorative balustrades and traditional homes. However, it is prone to surface rust if protective coatings fail. Regular maintenance, such as repainting or powder-coating every 3–7 years, is essential to preserve the metal and its appearance.
Pros: High strength, decorative look
Cons: Prone to rust, high maintenance
Cost: Moderate–High (per linear foot)
Lifespan: 15–30 years with regular upkeep
Maintenance: High – requires sanding and repainting periodically
Aluminum Railings
Aluminum is lightweight, corrosion-resistant, and ideal for outdoor decks and coastal areas. Powder-coated finishes are durable and require minimal upkeep. While aluminum is less rigid over long spans compared to steel, it provides an excellent balance of performance, affordability, and ease of installation.
Pros: Lightweight, corrosion-resistant, low maintenance
Cons: Less rigid for long spans
Cost: Low–Moderate
Lifespan: 20+ years with powder coating
Maintenance: Low – occasional cleaning and inspection of finish
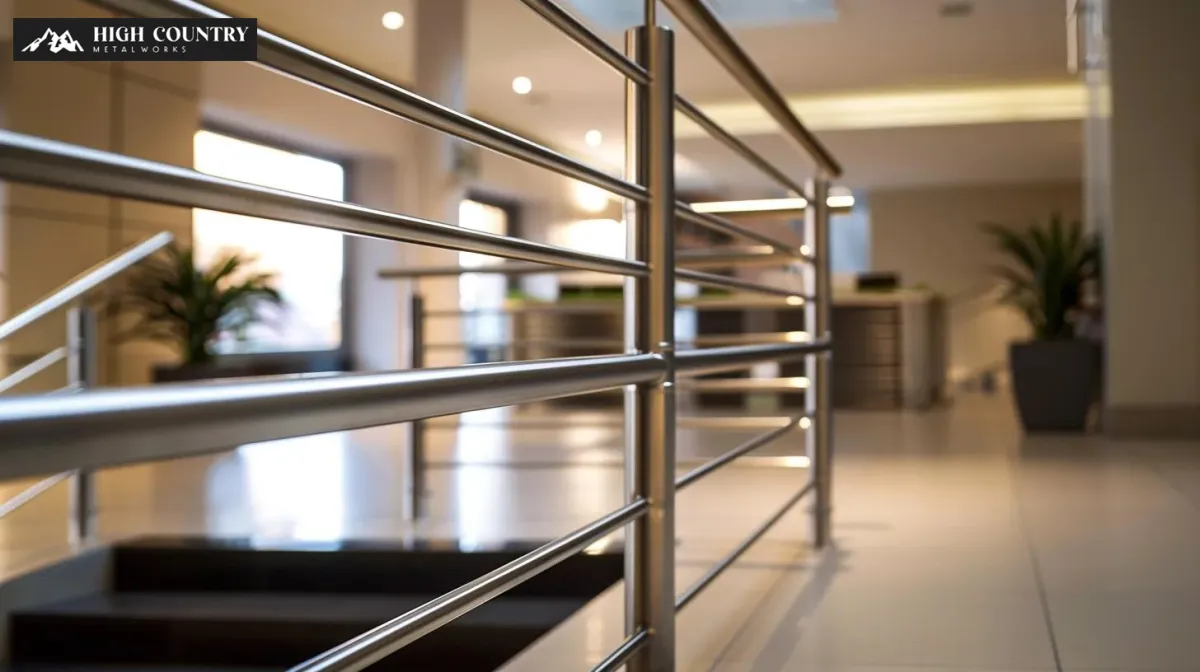
Stainless Steel Railings
Stainless steel offers a modern, sleek look with superior corrosion resistance. Marine-grade alloys perform exceptionally well in humid or coastal environments, making stainless steel ideal for commercial installations, coastal properties, and minimalist designs. It carries a higher upfront cost but delivers the lowest lifetime maintenance.
Pros: Very low maintenance, modern aesthetic, corrosion-resistant
Cons: Higher initial cost
Cost: High
Lifespan: 25+ years (marine grades last longer)
Maintenance: Very low – periodic cleaning
Galvanized and Mild Steel Railings
Galvanized and mild steel are strong and cost-effective but rely entirely on protective coatings to prevent rust. Without regular maintenance, especially in wet or coastal climates, these railings can deteriorate faster than other materials.
Pros: High strength, affordable
Cons: Needs coating maintenance in wet climates
Cost: Low
Lifespan: 10–25 years, depending on coating quality
Maintenance: Moderate–High – repair coatings as needed
How to Choose the Best Metal Railings for Your Project

Essential Selection Factors
Your installation location, local climate, and maintenance preferences should drive your material selection:
Environmental considerations:
Coastal or high-humidity exteriors: Choose stainless steel or powder-coated aluminum
Freeze-thaw cycles: Select materials with expansion gaps and flexible coatings
Dry climates: Most materials perform well with standard finishes
Load and use requirements:
Heavy loads or commercial settings: High-strength steel or stainless with engineered anchors
Residential decks and balconies: Aluminum or standard steel with proper fastening
Interior stairs: Any material works; focus on handrail ergonomics
Aesthetic goals:
Ornate, traditional styles: Wrought iron
Contemporary minimalism: Stainless steel
Warm contrast: Mixed materials (metal plus tempered glass or wood)
Maintenance preference:
Minimal upkeep: Stainless steel or powder-coated aluminum
Willing to repaint periodically: Wrought iron or coated steel
2025 Design Trends and Smart Features
Current trends emphasize clean lines and functionality:
Visual trends:
Minimal profiles with matte and textured finishes
Mixed-material designs combining metal with tempered glass or warm wood
Indoor-outdoor continuity for seamless transitions
Smart features:
Low-profile LED lighting integrated into top rails
Motion-sensing illumination for stairs (safety and ambiance)
Weatherproof controls and dimmable options
Sustainability:
Recycled-metal content reduces environmental impact
Longer-lasting powder coatings that minimize maintenance cycles
Locally sourced materials with lower transportation emissions
These trends influence material choices. Aluminum and stainless steel pair well with LED channels, while wrought iron suits traditional restoration projects seeking period-appropriate finishes.
Metal Railing Installation: Complete Step-by-Step Guide
Proper installation combines accurate layout, correct anchor selection, safe assembly practices, and adherence to building codes.

Installation Overview by Type
Deck-mounted Aluminum Kit
This type of installation requires a drill, level, and torque wrench. You’ll need anchors, fasteners, and sealant to complete the job. Installation typically takes between 4 and 8 hours per section and is considered moderately difficult. Key safety steps include using fall protection when working near deck edges.
Concrete-mounted Stainless Posts
Installing stainless posts into concrete demands a hammer drill and epoxy anchor tools. Supplies include epoxy and expansion anchors. Expect the installation to take 6 to 12 hours per section, with a high level of difficulty. Safety measures include verifying anchor embedment and using eye and respiratory protection.
Wrought Iron (Welded)
Wrought iron installations require a welder, grinder, and clamps. You will also need welding rods, primer, and paint. The duration varies depending on whether fabrication is done in a shop. This method is for experts, and proper welding PPE and fume extraction are required for safety.
Retrofit Steel on Wood
For retrofitting steel onto wood, you’ll need a drill, lag bolts, and washers. Supplies include galvanized hardware and sealant. Installation usually takes 3 to 6 hours per section and is moderately difficult. Always check the condition of the structural wood before anchoring to ensure safety.
Required Tools, Materials, and Safety Gear
Essential tools:
Drill with metal and concrete bits
Level and square for precise layout
Torque wrench for specified fastener tension
Measuring tape and marking tools
Hammer drill for concrete installations
Supplies:
Appropriate anchors (concrete epoxy anchors, expansion bolts, or lag screws for wood)
Stainless or galvanized fasteners matching your material
Sealants or anti-corrosion primers
Powder-coating touch-up kits
Safety equipment:
Eye protection (required for all cutting and drilling)
Work gloves
Ear protection for power tools
Fall prevention equipment for elevated work
Respirators, gloves, and proper ventilation for welding
Step-by-Step Installation Process
Phase 1: Layout and Planning
Measure and mark post locations according to your design
Verify spacing meets local building codes (typically 4-foot maximum spacing)
Check plumb and level at all marked locations
Confirm substrate can support intended loads
Phase 2: Anchoring Posts
Pre-drill holes sized appropriately for your anchor type
For concrete: Use epoxy anchors with proper cure time before loading
For wood: Ensure structural integrity; use lag screws with washers
Secure posts with anchors, checking plumb again after tightening
Allow epoxy anchors to cure per manufacturer's specifications
Phase 3: Rail Assembly
Attach top and bottom rails to posts
Follow manufacturer torque specifications for all fasteners
Secure balusters at proper spacing (typically 4 inches or less)
Leave proper expansion gaps in long runs (thermal expansion)
Double-check level across entire rail section
Phase 4: Finishing
Seal post bases with appropriate sealant
Apply touch-up coating to any scratches or exposed metal
Final inspection of all connections and fasteners
Clean up and remove protective films
Common mistakes to avoid:
Under-sizing anchors for substrate and load
Failing to account for thermal expansion in long runs
Inadequate sealing at post bases (allows water ingress)
Skipping manufacturer torque specifications
Installing before checking local permit requirements
Building Codes and Safety Standards
Building codes dictate measurable constraints that directly impact your design:
Guard and handrail heights:
Residential stair handrails: 34–38 inches from nosing to top of gripping surface
Guards on open sides: 36 inches or higher for walking surfaces
Always verify local jurisdiction variations
Baluster spacing:
Maximum spacing typically prevents passage of 4-inch sphere
Reduces child entrapment risk
Some jurisdictions have stricter requirements
Graspability standards:
Handrails must allow full hand grasp
Circular or consistent gripping profiles required
Minimum clearance between wall and handrail for fingers
Load requirements:
Codes specify lateral force resistance
May require engineered anchors or moment connections
Commercial installations have stricter requirements
Critical reminder: Local jurisdictions may modify national codes. Verify local requirements before finalizing design and permit applications.
DIY or Professional Installation?
Choose DIY when:
Installing manufacturer-supplied railing kits
Working on accessible decks or interior stairs
You have basic tools and can meet code requirements
Installation involves straightforward anchoring
Hire a professional when:
Work involves welded fabrications
Complex anchors in concrete or engineered connections are required
High fall-risk locations
Commercial occupancy loads apply
Local code or permits mandate licensed installers
Uncertain about substrate condition or load capacity
Professionals provide engineered attachments, warranty coverage, and inspection-ready installations that reduce liability.
Maintenance and Care for Long-Lasting Metal Railings

Routine maintenance preserves appearance and structural integrity by preventing corrosion, loosening of fasteners, and coating failure.
General Maintenance Schedule
Monthly tasks:
Visual inspection for loose fasteners
Check for early signs of corrosion
Remove debris and standing water
Annual tasks:
Detailed inspection of welds, anchors, and finish adhesion
Thorough cleaning with mild detergent and water
Touch up any coating damage
Torque check on critical fasteners
Document findings in maintenance log
Keep a maintenance log noting:
Inspection dates
Fastener torque checks
Touch-up work completed
Any recurring issues identified
Early detection of paint cracking or surface pitting makes treatments less invasive and extends service life significantly.
Rust Prevention and Treatment
Prevention strategies:
Use corrosion-resistant materials from the start (stainless, aluminum, galvanized), combined with durable finishes like high-quality powder coating or zinc-rich primers on steel and wrought iron.
Four-step rust repair process:
Clean the area: Remove dirt, loose paint, and debris
Mechanically remove rust: Use wire brush, sandpaper, or grinder to reach bright metal
Apply primer: Use rust converter or zinc-rich primer on bare metal
Finish coat: Apply compatible topcoat or paint system
For deep structural corrosion: Replace affected sections or consult a fabricator. Cosmetic fixes are not substitutes for compromised structural members.
Use chemical rust inhibitors and epoxies for pitting, ensuring all coatings cure fully before weather exposure.
Material-Specific Care Guidelines
Wrought iron maintenance:
Inspect annually for paint failure
Sand back to bright metal where rust appears
Apply rust-inhibiting primer immediately
Repaint with exterior-grade coatings every 3–7 years, depending on exposure
Increase frequency in humid or coastal environments
Aluminum care:
Wash with mild detergent and water
Avoid abrasive cleaners that scratch powder coating
Inspect powder coat for chips
Touch up chips promptly with compatible paint to prevent localized corrosion
No painting required for bare aluminum in most climates
Stainless steel maintenance:
Clean with non-chloride cleaners
Remove salt deposits with fresh water and mild detergent
Polish occasional fingerprints or surface oxides
Never use steel wool (embeds iron particles that rust)
Marine environments need more frequent cleaning
Galvanized/steel care:
Monitor for coating breakdown
Treat exposed metal immediately with zinc-rich primer
Consider periodic re-coating in harsh climates
Address rust spots before they spread
Seasonal and Climate-Specific Maintenance
Spring tasks:
Thorough inspection after winter
Remove salt and de-icing residues
Touch up coatings damaged by winter weather
Check for loosened fasteners from freeze-thaw
Summer tasks:
Inspect for heat-related expansion
Check fastener tightness
Clean accumulated pollen and debris
Verify drainage around post bases
Fall preparation:
Seal joints before wet weather
Ensure water doesn't pond around post bases
Apply protective coatings if needed
Clear debris from railing channels
Winter monitoring:
Promptly remove salt and de-icing chemicals
Monitor for freeze-thaw damage
Check for ice buildup that could stress connections
Avoid using metal tools that scratch coatings
Climate-specific guidance:
Coastal properties:
Rinse frequently to remove salt deposits
Use stainless steel or heavily coated aluminum
Increase inspection frequency to monthly
Consider marine-grade materials and fasteners
Snowy inland climates:
Focus on durable coatings resistant to freeze-thaw
Seal post bases to limit moisture ingress
Remove snow buildup promptly
Use non-corrosive de-icing methods
Humid environments:
Increase ventilation around railings
Monitor for mildew and organic growth
Clean more frequently
Use moisture-resistant coatings
Building Codes and Safety Standards: Essential Requirements
Codes set mandatory dimensions and load capacities to protect occupants. Compliance ensures safety and avoids failed inspections.

Residential Code Requirements
Handrail specifications:
Height: 34–38 inches measured vertically from stair nosing
Continuity: Required along full length of stairs
Returns: Must return to wall or post at ends
Graspability: Circular cross-sections or consistent profiles allowing full hand grasp
Guard specifications:
Height: Minimum 36 inches for decks and balconies
Baluster spacing: Maximum 4-inch sphere passage
Load resistance: Minimum 200 pounds concentrated load at top rail
Commercial Code Differences
Commercial codes demand stricter requirements:
Structural requirements:
Higher live-load resistance
Engineered connections often mandatory
Professional inspections required
Greater minimum guard heights
Accessibility (ADA) standards:
Extended handrails at stair landings
Specific clearance dimensions
Continuous graspable surface
Tactile indicators for vision impairment
Critical note: Projects changing occupancy or use must meet appropriate commercial or residential standards. Consult an engineer or local code official when uncertain.
Budgeting for Metal Railings: Understanding Total Costs
Realistic budgeting separates material cost, labor, finishes, permits, and lifecycle maintenance to compare true value.
Aluminum Railing Kit
Aluminum railing kits typically cost between $30 and $80 per foot. Installation usually takes 4 to 8 hours. These railings have a long lifespan of over 20 years and require minimal annual maintenance, generally ranging from $0 to $50.
Stainless Steel Railing
Stainless steel railings are priced between $80 and $200 per foot. Installing them takes approximately 6 to 12 hours. They are extremely durable, with a lifespan exceeding 25 years, and have very low annual maintenance costs, typically $0 to $25.
Wrought Iron (Custom)
Custom wrought iron railings range from $75 to $150 per foot. Labor hours vary depending on design complexity. These railings can last 15 to 30 years and generally have moderate to high annual maintenance costs, ranging from $50 to $200.
Concrete Anchoring & Epoxy
Concrete anchoring and epoxy cost between $10 and $30 per anchor, with installation taking 1 to 3 hours. While the lifespan is not specifically defined, maintenance costs are low to moderate, usually $0 to $50 per year.
Factors Affecting Total Cost
Material selection:
Base metal cost varies significantly
Finish quality (powder coating, galvanization) adds 20–40%
Custom fabrication increases costs substantially
Installation complexity:
Corners and stairs require more labor
Substrate type affects anchor costs
Site access impacts equipment needs
Regional factors:
Local labor rates vary by location
Permit fees differ by jurisdiction
Shipping costs for heavy materials
Hidden costs:
Warranty coverage value
Required engineering stamps
Inspection fees
Seasonal delays affecting labor scheduling
Lifecycle Cost Analysis
Calculate the total cost over 10 years for accurate comparison:
Formula: (Initial material + installation + permits) + (annual maintenance × 10 years) ÷ expected service life = annualized cost
Example comparison:
Option A - Galvanized steel:
Initial: $2,000
Maintenance: $150/year × 10 = $1,500
Total: $3,500 ÷ 15 years = $233/year
Option B - Stainless steel:
Initial: $4,000
Maintenance: $25/year × 10 = $250
Total: $4,250 ÷ 25 years = $170/year
Despite a higher upfront cost, stainless steel provides better value over time through reduced maintenance and longer lifespan.
Budget strategy: Prioritize low-maintenance, high-durability materials when lifecycle analysis favors them, even with higher initial investment.
Conclusion: Making the Right Choice for Your Metal Railings
Selecting, installing, and maintaining metal railings involves balancing aesthetics, budget, and long-term performance. Stainless steel and aluminum offer the best lifecycle value for most applications, while wrought iron provides unmatched visual character for traditional designs.
Key takeaways:
Match material to your climate and maintenance tolerance
Invest in quality installation, proper anchoring determines longevity
Follow building codes to ensure safety and pass inspections
Implement season-specific maintenance to prevent costly repairs
Calculate lifecycle costs, not just initial price
Whether choosing a DIY aluminum kit or hiring professionals for custom wrought iron, this guide provides the framework for decisions that deliver safety, beauty, and lasting value.
Ready to start your project? For custom metal railings in Utah, trust High Country Metal Works to craft durable, beautiful solutions tailored to your home’s needs. Protect and enhance your property with railings designed to last for decades.
Frequently Asked Questions
1. What are the safety considerations when installing metal railings?
Ensure railings meet local codes for height, spacing, and load. Use proper anchors, fasteners, and PPE. Check for sharp edges and inspect regularly after installation.
2. How do I choose the right finish?
Select a finish based on environment and maintenance tolerance. Powder coating offers durability and color options; galvanization protects steel in humid or coastal areas.
3. What are the environmental impacts of different materials?
Aluminum and stainless steel are recyclable and long-lasting. Wrought iron requires more maintenance and repainting. Using recycled or locally sourced materials reduces environmental impact.
4. How can I enhance the aesthetic appeal?
Combine metal with wood or glass, add decorative elements, use powder-coated colors, or integrate LED lighting for style and ambiance.
5. What are common installation mistakes?
Avoid misalignment, incorrect anchors, ignoring thermal expansion, and non-compliance with building codes. Measure carefully and follow safety standards.
